Address editor
You can think of the address editor in terms of list of contacts or a phone or address book, it includes 2 sections - one for wallets (and usernames for pools that require username passed instead of wallet address) and one for pools. You fill the entries (addresses), give each a name (tag name), and after saving can use the entries in configs, config templates, profit switch, without the need to fill the entries manually every time.
How does the address editor work?
Here we can see the sections of Pools and Wallets, where there is a table underneath each.
Tag name
To the left, the column is called "Tag Name", and in our Contacts List analogy this is the Contact's Name field. Tag name can be anything you like as this is only the label you will be using across your minerstat dashboard. Tag name must be unique though (you can't use same tag names for different pools or different wallts).
Address
To the right, the column is called "Pool Address" when in Pools section and "Pool username or wallet address" when in Wallets section. This is equal to the address of the Contact in the analogy.
Export/Import
We can also see the export and import buttons on top right for backing up or restoring multiple pools or wallets at once.
Using the address editor
Adding a pool or wallet
Let's say we want to add Ezil.me ETH+Zil pool address and name it EZIL-ETH.
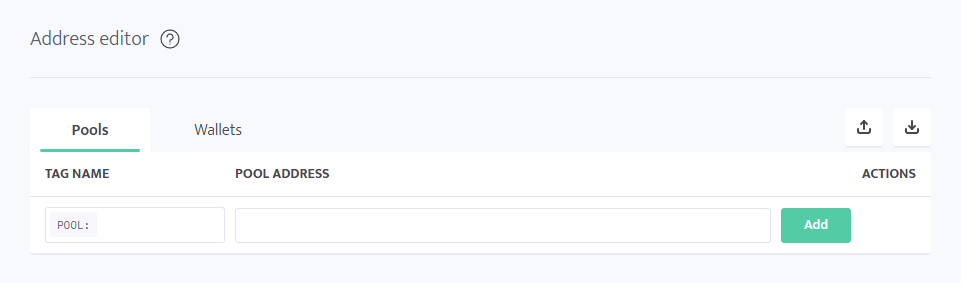
First, let's navigate to the pools section of address editor.
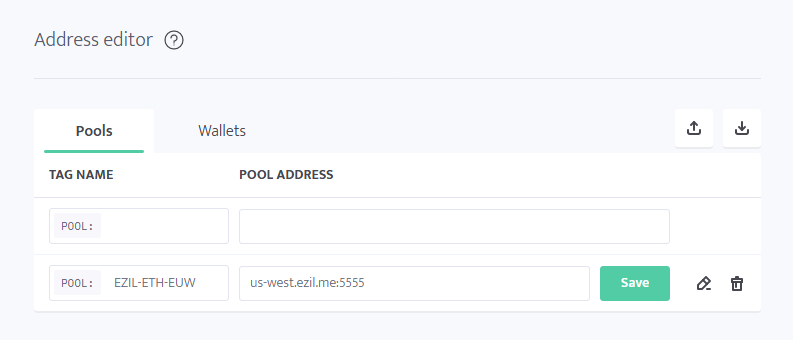
Fill the Tag Name with "EZIL-ETH" and the "Pool Address" with the address.
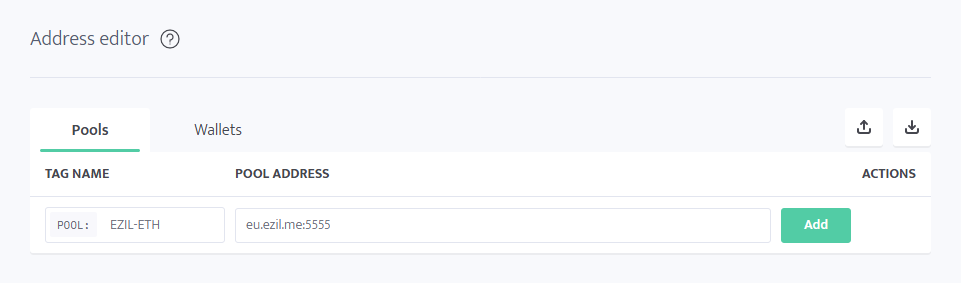
Don't close the address editor just yet, otherwise the tag will not be saved.
Now press "Add", you will see a checkmark appear in place of the "Add" button, after which the added entry will move down and we'll be presented with another empty field where we can add another pool.
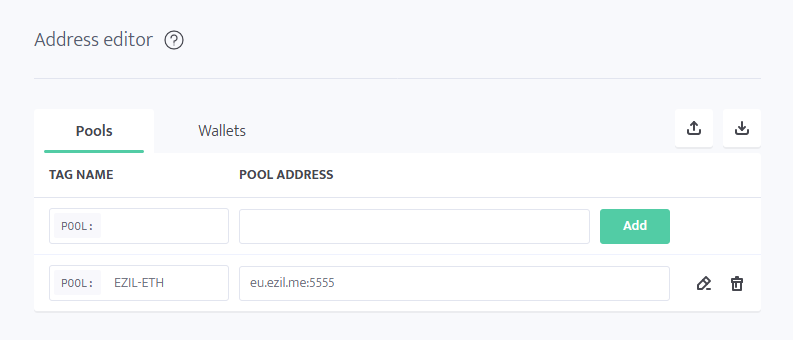
You can see two buttons appear on the right, one to Edit the entry (the pencil), and one to remove it (the trash bin).
Editing an entry in address editor
Open the address editor page, then the section in which you want to edit the address.
You can proceed to click the Edit button on the right of the entry, or simply click the field you want to modify. It's possible to edit both the tag name and the contents of the tag (pool address or wallet address or username) at the same time, and then you need press the Save button to the right of the edited entry.
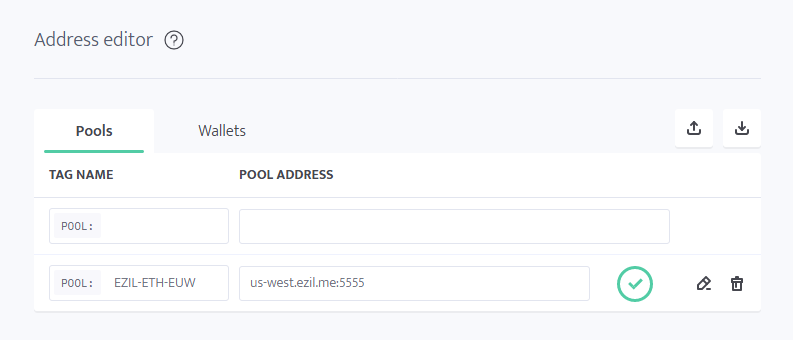
Let's say, we use the example address we created above and want to change it to the USA West server of the pool, and make it clear that the address is for USA West server by changing the name.
Don't forget to click the appeared Save button. You will see a circled checkmark appear in place of the Save button for a brief moment of time which means that our changes have been saved.
Removing an entry from address editor
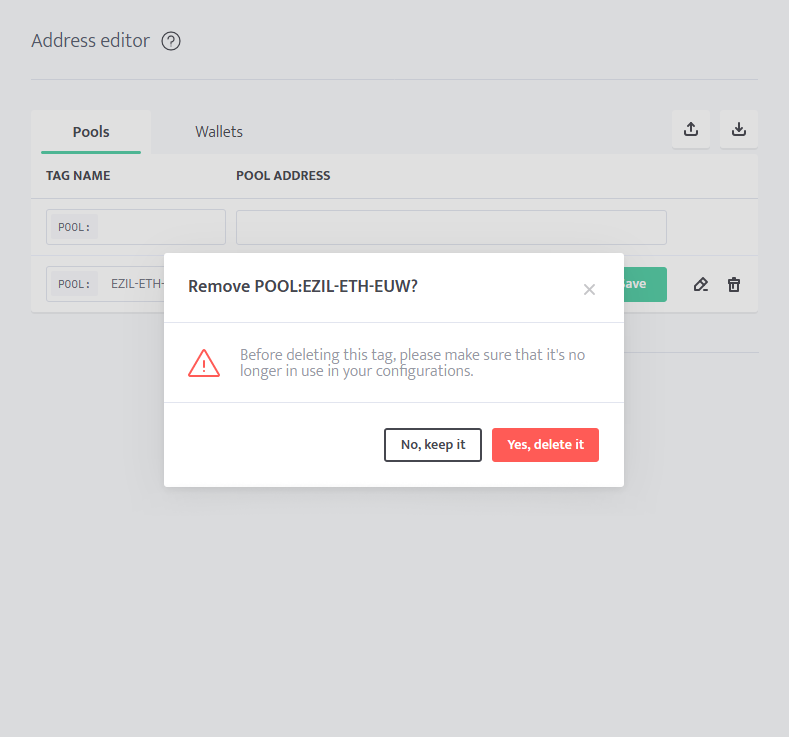
Right next to the edit button, there is the remove button, which looks like a trash bin.
Upon clicking it, you will be presented with a warning that you should make sure that no configurations are using it, otherwise those configurations will not work.
If you missed a configuration where you're using the Tag you had removed, you will see a Red warning on the page of the worker, stating "Undefined tags":

Alternative way to add or edit tags
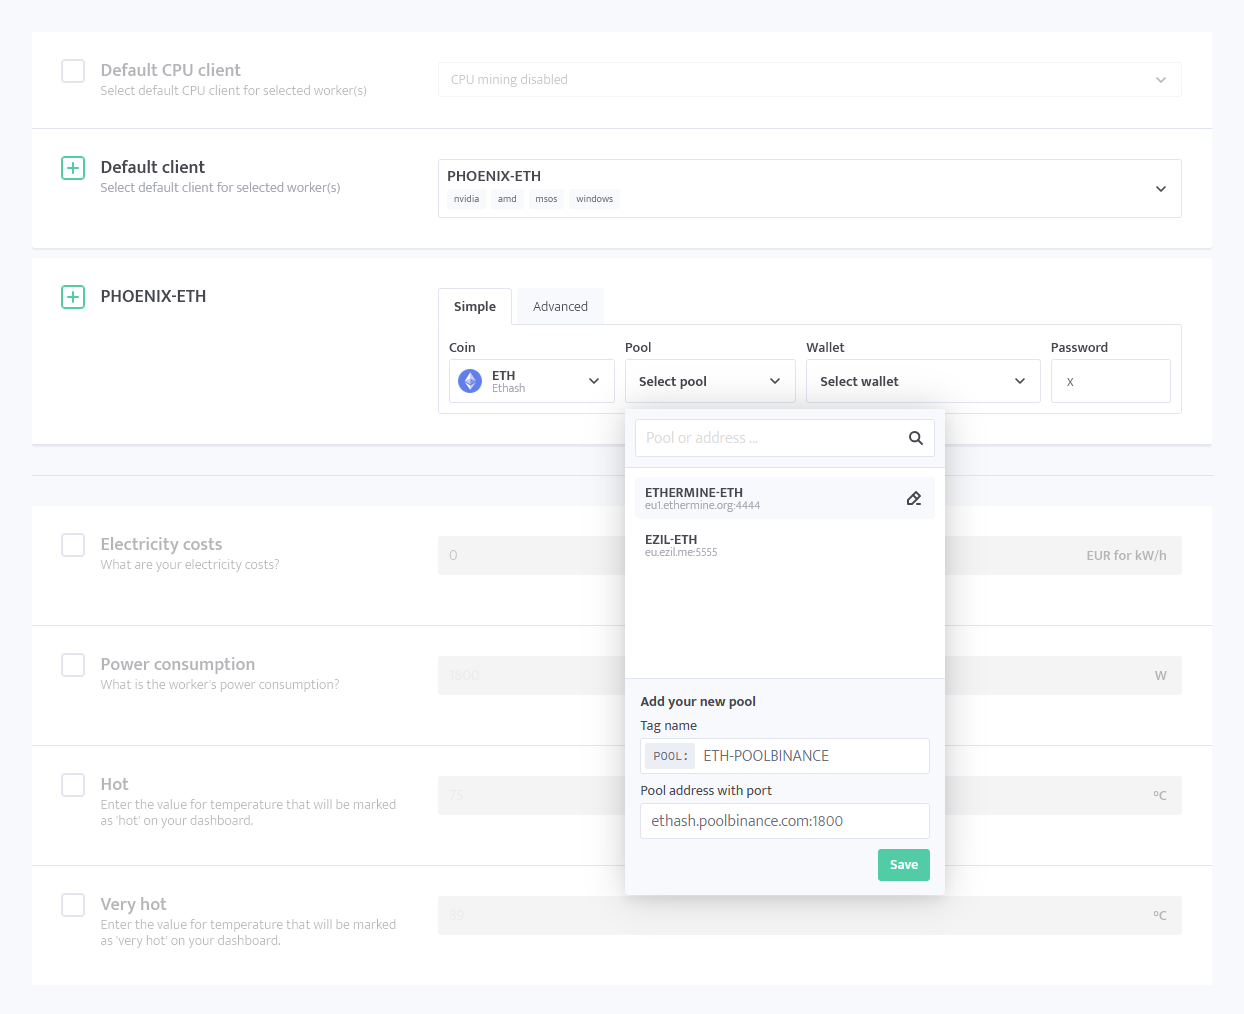
You can also add or edit tags whenever a tag selection menu opens. Simply fill the "Tag name" and "Pool address with port" fields and press Save. To edit an existing entry, hover over the entry and click the pencil icon, then follow the adding procedure.
Using the created tags
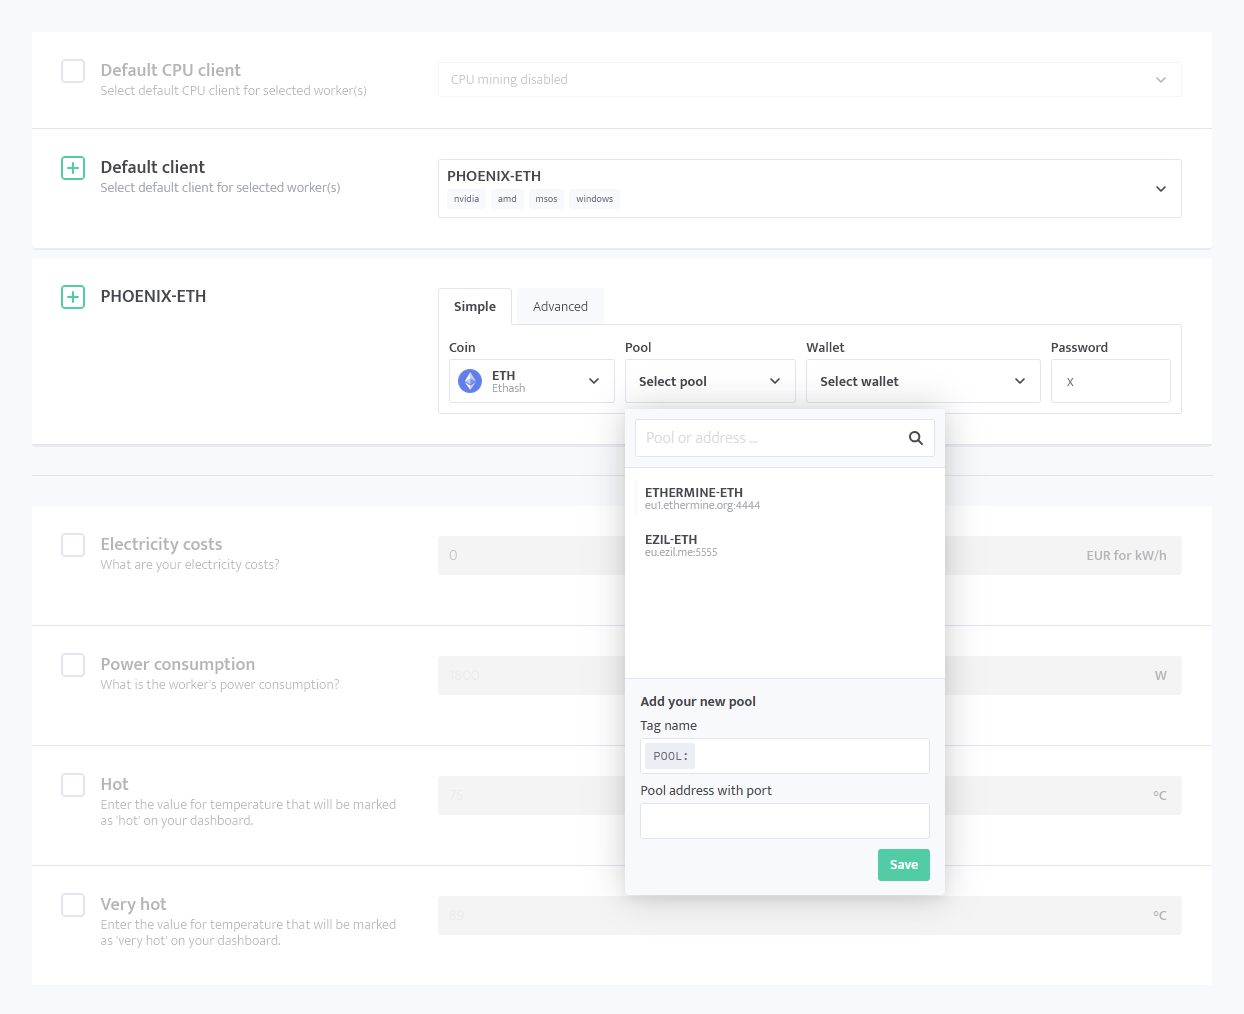
Simple miner config
Here, navigate to the worker's config and select the Simple tab. Then click the "Select pool" or "Select wallet" dropdown menu and select the necessary. You can also edit or add tags, explained above in the "Alternative way to add or edit tags" part of this article.
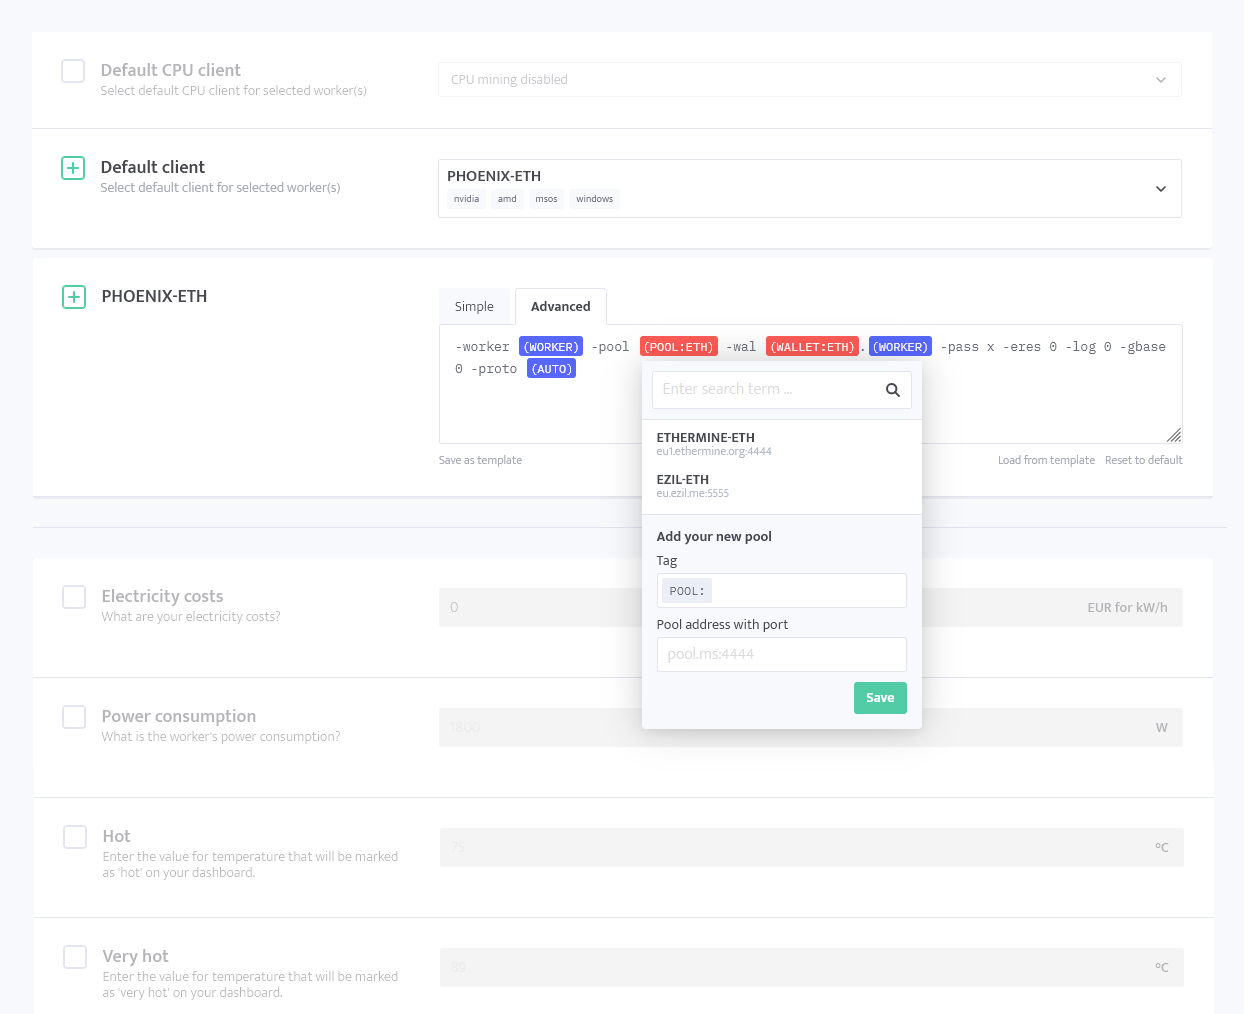
Advanced config and templates
With the advanced config, you can click on the tag to open the dropdown menu for the type of address you're changing, or, you can write (WALLET: or (POOL: to open the Wallet or Pool selection menu respectively. There, you can select the address, edit or add it as described above in the "Alternative way to add or edit tags" part of this article.
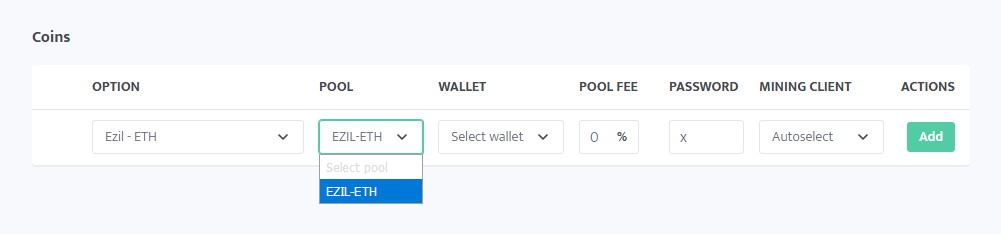
Profit Switch
Tags are also used in Profit Switch. Before you can select a tag, you must add it to the address editor.
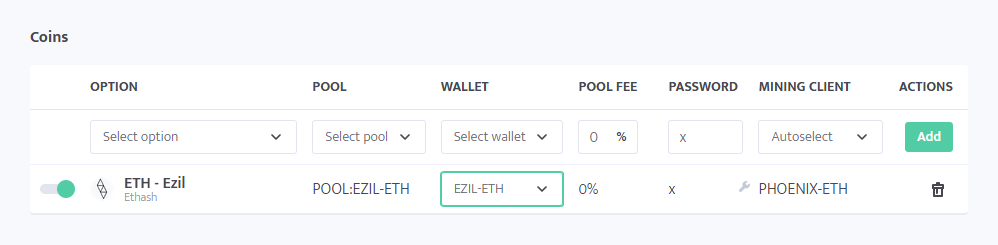
When adding the option, click the dropdown menu and select the entry you would like to use:
To change the existing configuration, click the selected Pool or Wallet tag to open the same menu as above. Here, we clicked on the selected wallet: